| | |
■DatePicker 作成
DatePickerは年月日が選択できるウィジェットです。
1. 次のようにEclipseから新しいプロジェクトを生成します。
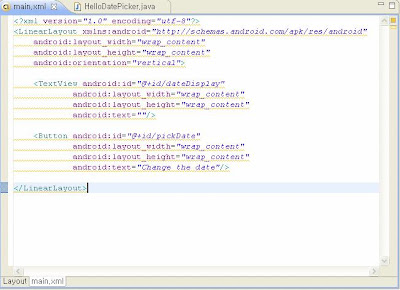
2. res -> layout -> main.xmlファイルのソースコードを修正します。
<?xml version="1.0" encoding="utf-8"?> <LinearLayout xmlns:android="http://schemas.android.com/apk/res/android" android:layout_width="wrap_content" android:layout_height="wrap_content" android:orientation="vertical"> <TextView android:id="@+id/dateDisplay" android:layout_width="wrap_content" android:layout_height="wrap_content" android:text=""/> <Button android:id="@+id/pickDate" android:layout_width="wrap_content" android:layout_height="wrap_content" android:text="Change the date"/> </LinearLayout> |
[ main.xml ]
3. HelloDatePicker.java を編集します。
package my.HelloDatePicker; import java.util.Calendar; import android.app.Activity; import android.app.DatePickerDialog; import android.app.Dialog; import android.os.Bundle; import android.view.View; import android.widget.Button; import android.widget.DatePicker; import android.widget.TextView; public class HelloDatePicker extends Activity { private TextView mDateDisplay; private Button mPickDate; private int mYear; private int mMonth; private int mDay; static final int DATE_DIALOG_ID = 0; @Override protected void onCreate(Bundle savedInstanceState) { super.onCreate(savedInstanceState); setContentView(R.layout.main); // capture our View elements mDateDisplay = (TextView) findViewById(R.id.dateDisplay); mPickDate = (Button) findViewById(R.id.pickDate); // add a click listener to the button mPickDate.setOnClickListener(new View.OnClickListener() { public void onClick(View v) { showDialog(DATE_DIALOG_ID); } }); // get the current date final Calendar c = Calendar.getInstance(); mYear = c.get(Calendar.YEAR); mMonth = c.get(Calendar.MONTH); mDay = c.get(Calendar.DAY_OF_MONTH); // display the current date updateDisplay(); } @Override protected Dialog onCreateDialog(int id) { switch (id) { case DATE_DIALOG_ID: return new DatePickerDialog(this, mDateSetListener, mYear, mMonth, mDay); } return null; } private void updateDisplay() { mDateDisplay.setText( new StringBuilder() // Month is 0 based so add 1 .append(mMonth + 1).append("-") .append(mDay).append("-") .append(mYear).append(" ")); } private DatePickerDialog.OnDateSetListener mDateSetListener = new DatePickerDialog.OnDateSetListener() { public void onDateSet(DatePicker view, int year, int monthOfYear, int dayOfMonth) { mYear = year; mMonth = monthOfYear; mDay = dayOfMonth; updateDisplay(); } }; } |
※ Ctrl+ Shift + O で必要なpackageは自動追加されます。
4. Run -> Run で実行します。
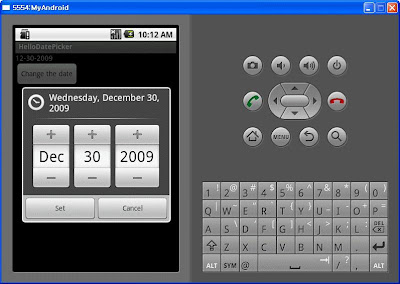
[ 実行結果 ]
実行までは多少時間がかかる場合があります。
change the date ボタン押下すると、 DatePickerが表示されます。
次は日付がYYYY-MM-DD形式で表示されるように修正したコードと結果です。
private void updateDisplay() { mDateDisplay.setText( new StringBuilder() // Month is 0 based so add 1 .append(mYear).append("-") // 年度が先に出力されるように変更 .append(mMonth + 1).append("-") .append(mDay) ); } |
[ 実行結果 ]


